Benefits of totes
•Totes are less expensive than aquariums and come in a wider variety of sizes.
•In order to upgrade you don't have to buy a whole new unit. You can add onto the original enclosure.
•Heat and humidity are typically easier to maintain in totes as opposed to tanks.
•Decorating is easier in totes. By drilling holes in the tote you can use zip ties to hold plants, wood, caddies, ect.
Disadvantages of totes
•Totes aren't as attractive as glass aquariums.
•It's not always as easy to see through the plastic of totes.
Setting up Your Tote
You'll want to start creating your new enclosure by drilling holes in the sides. Before you start decide where you want the holes to be. Keep in mind that you'll need holes for air pump tubes, ventilation and decorations.
Once you have drilled the holes empty the tote of any plastic debris that may have fallen inside. Now you can add the substrate and all the decorations. Here is Yuka's guide to setting up a tote: http://hermitcrabassociation.com/phpBB/ ... 39&t=94562
Heating Totes
A question that I've seen multiple times is, How do you heat a tote? The safest way to heat a tote is with a heat mat. I recommend the brand Fluker's or Ultratherm. These brands can be insulated and are safe when in contact with plastic.
Heat mats from brands like Zoo-med or Zilla can be used on plastic but cannot be insulated. Besides that, they typically aren't very strong and don't emit a large amount of heat. In the end it would be most beneficial to buy a nicer heater for a little extra cost.
One thing you do not want to use near a tote is a heat lamp. These get very hot and will melt plastic quickly. Melted plastic is not safe for your heath and can also be a fire hazard.
Insulating
In addition to insulating heating equipment it may be necessary to insulate the tote itself. A good amount of heat can escape through the sides and in order to keep it in you may need to insulate it. Using styrofoam, cardboard or aluminum foil insulate your tote. You don't need to cover the entire tote (nor do you want to. You want to be able to see inside right?) On my tote I have the lid insulated with thick styrofoam and that has done the trick.
Upgrading
One reason I love totes so much is the ease of upgrading. Like I mentioned above, you don't have to replace your old tote with a new one. You can just add onto it. There are a few different ways to do this.
#1
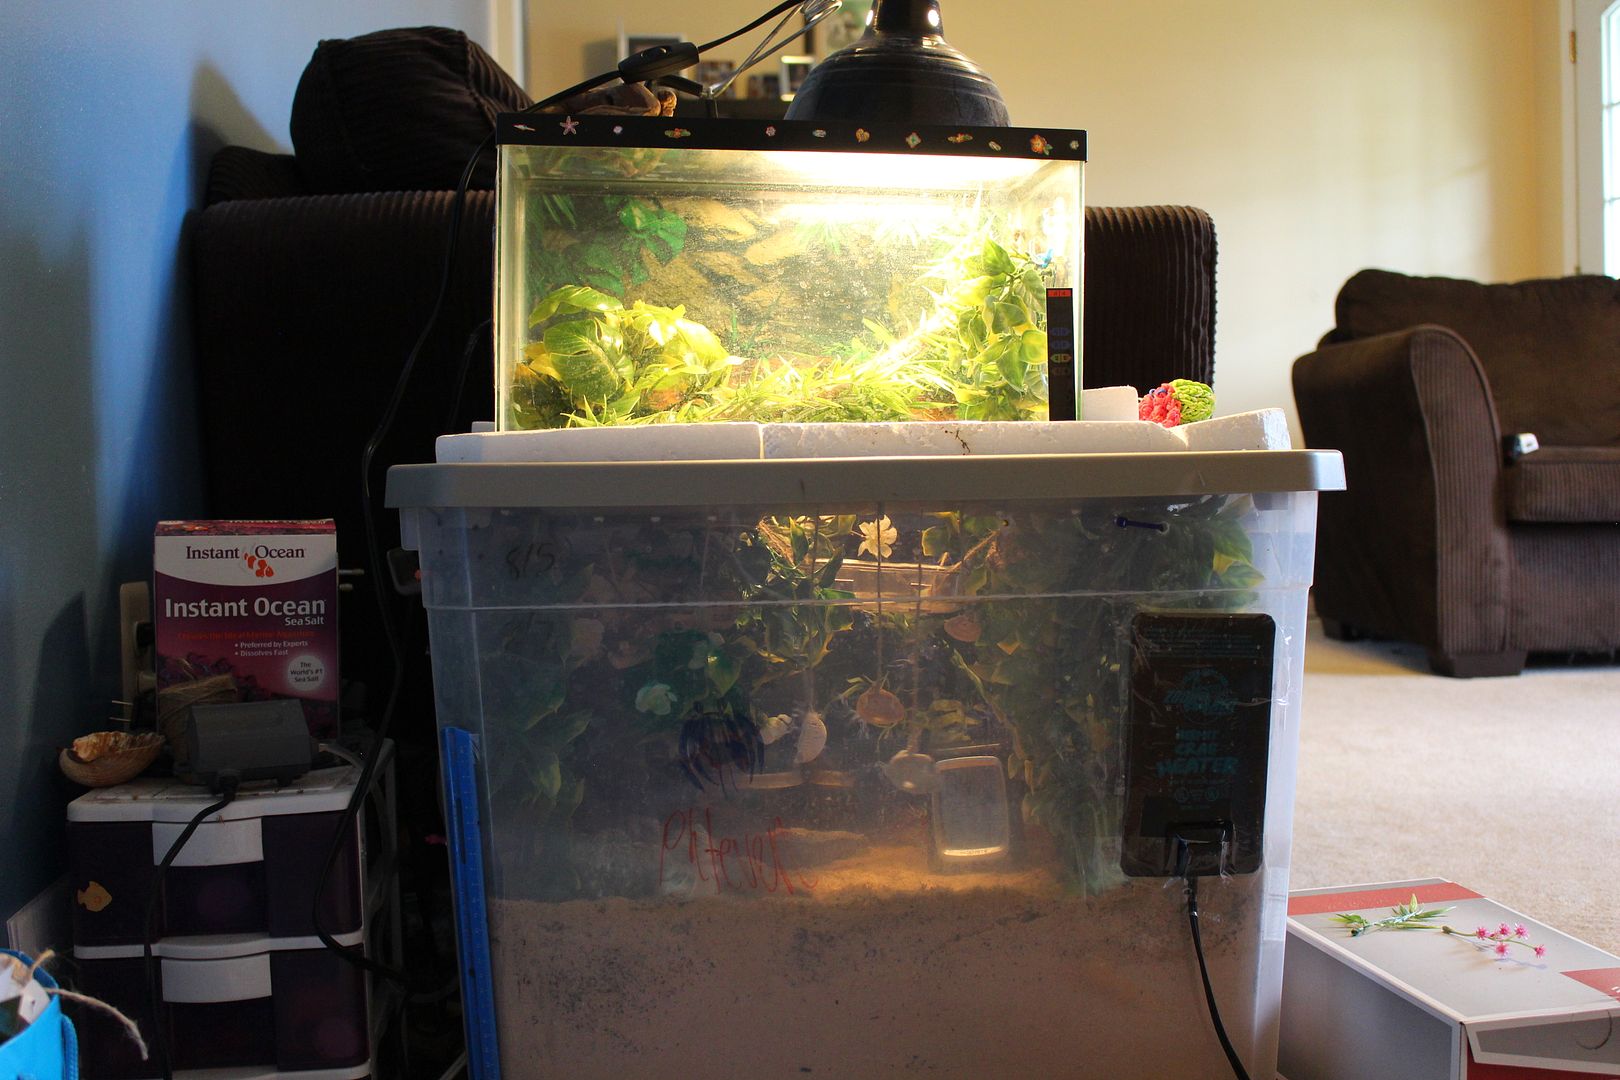
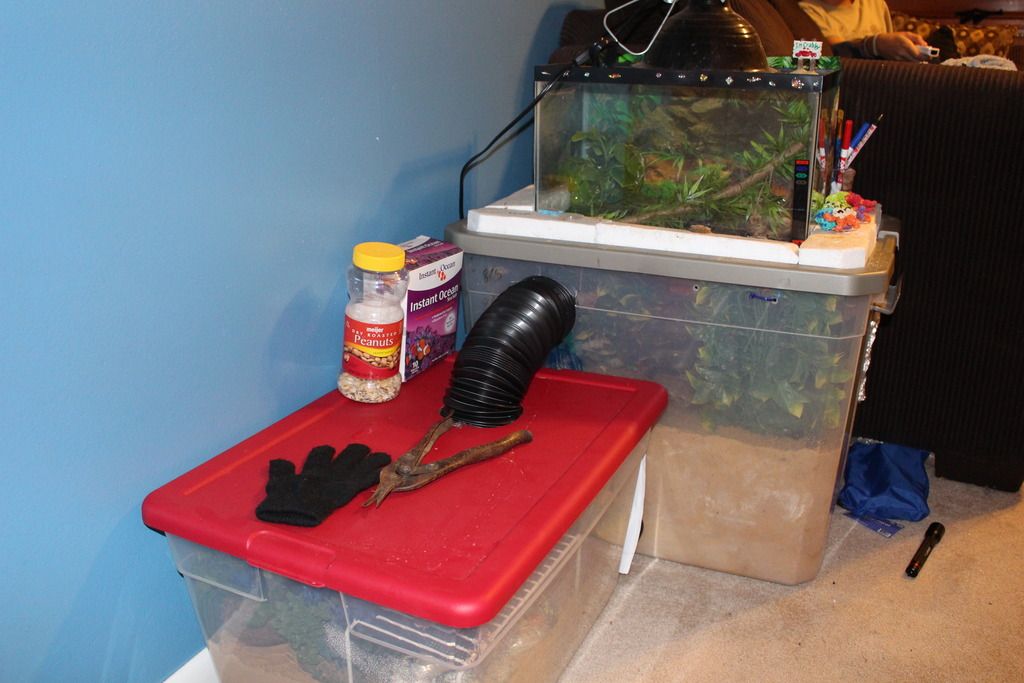
One way to add room onto your tote is by building upward with another tote bin or small aquarium. This is a great way to add climbing space. Your crabs will love it! Seriously, mine will stay up there for hours.
I used a five gallon aquarium on top of my original storage bin. To attach the tank I cut a section out of the tote's lid with an xacto knife. After that I attached two Command Velcro strips to the tank's lid (which then became the bottom) and the tote's lid.
This doesn't have to be done with tanks alone. You could attach another tote or a large critter keeper for example.
#2
Another way to upgrade is by adding a whole new tote bin. This method is a bit harder but it gives the crabs a lot more room to explore.
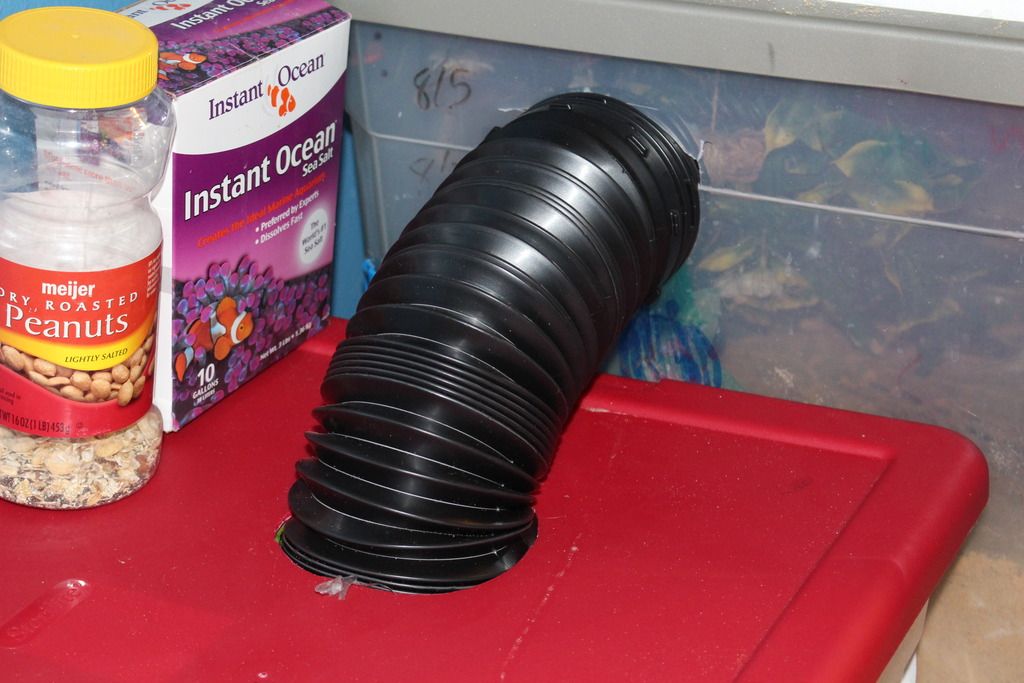
In order to attach one tote to another you'll need a tube for the crabs to climb through. There are a few different options,
•An extendable gutter attachment (With this you can position the attachment in a curve or a straight line.)
•PVC pipe (A PVC pipe can only go straight. From one side of the tote to the side of the other)
Keep in Mind: Your hermit crabs will need to fit through whatever attachment you use. Buy something with a large diameter so they can use it for as long as possible. You don't want to go tearing apart the crabitat to get out a stuck crab.
Now comes the hard part, attaching the tube. Decide first what the best way to attach the totes will be. Consider how the tube might stick out once it's in place. You don't want it where it can be easily bumped. Can the crabs access the tube easily? Consider all possibilities so you don't regret how you positioned the tube later.
Here are some ideas on arranging two totes:
•Take a PVC pipe from one side of the original tote directly to the side of the other tote.
•Use a gutter attachment and go from one side to another side.
•Use a gutter attachment and go from lid to side OR lid to lid.
•Use cinder blocks to lift up a smaller tote to the height of the other to make attaching them easier.
Now that you have a plan, it's time to start construction. Use a marker to trace out the two holes for the tube. Cut out that area and work the tubing in. If you're using a gutter attachment you should be able to stick it into the holes and be done. PVC pipe, on the other hand, will need to be held in place with an aquarium safe glue.
In theory cutting some plastic and sticking a pipe in sounds easy. But, it can be much harder than you think. There are two different kinds of plastic used for totes. There is a softer kind (which is usually colored.) and a much tougher kind (usually clear.) Cutting the softer plastic can be done easily with and xacto knife. However, the clear plastic is way more difficult to cut. When I was cutting my tote I went through several (broken) notches of an xacto knife, a steak knife, scissors and a metal cutter. If you plan on cutting through the tough plastic use something strong, like a jigsaw, and be careful.
Here is my current crabitat. Oh my, I just thought of this, crabitote...ok, I'm leaving now
Totes offer endless possibilities. You could literally fill and entire room (or more
 . How long does the tote stay firm and nice? You know since sometimes they slouch and droop a llittle. How doesn't the heat mat melt right though? I've always seen people use totes for leopard geckos and anoles but never for crabs. Love how convienent its written out and "Crabitote" fits it perfectly lol. I might even consider making a huge tote fort for my crabbies. LOL